
[et_pb_section fb_built=”1″ _builder_version=”4.18.0″ _module_preset=”default” background_color=”#f0f9ff” custom_padding=”50px||50px||true|false” locked=”off” global_colors_info=”{}”][et_pb_row _builder_version=”4.18.0″ _module_preset=”default” width=”90%” max_width=”900px” animation_style=”slide” animation_direction=”top” animation_duration=”1500ms” global_colors_info=”{}”][et_pb_column type=”4_4″ _builder_version=”4.17.6″ _module_preset=”default” global_colors_info=”{}”][et_pb_text _builder_version=”4.18.0″ _module_preset=”default” text_font=”||||||||” text_text_color=”#0173fe” text_font_size=”18px” header_text_align=”center” text_orientation=”center” module_alignment=”center” custom_margin=”||15px||false|false” text_font_size_tablet=”18px” text_font_size_phone=”16px” text_font_size_last_edited=”on|phone” header_text_align_tablet=”center” header_text_align_phone=”left” header_text_align_last_edited=”on|phone” header_font_size_tablet=”50px” header_font_size_phone=”46px” header_font_size_last_edited=”on|phone” text_orientation_tablet=”center” text_orientation_phone=”left” text_orientation_last_edited=”on|phone” global_colors_info=”{}”]
Zoom Integration
[/et_pb_text][et_pb_text admin_label=”Text” _builder_version=”4.18.0″ _module_preset=”default” text_font_size=”18px” text_line_height=”172%” header_text_align=”center” header_3_text_color=”#0173fe” header_3_font_size=”25px” text_orientation=”center” module_alignment=”center” custom_margin=”||0px||false|false” text_font_size_tablet=”18px” text_font_size_phone=”16px” text_font_size_last_edited=”on|phone” header_text_align_tablet=”center” header_text_align_phone=”left” header_text_align_last_edited=”on|phone” header_font_size_tablet=”50px” header_font_size_phone=”46px” header_font_size_last_edited=”on|phone” text_orientation_tablet=”center” text_orientation_phone=”left” text_orientation_last_edited=”on|phone” global_colors_info=”{}”]
Overview
Treffas makes video conferencing and client calls easy and simple from anywhere in the world. By linking your Zoom account with Treffas, you can open the lines of communication with clients and co-workers. The service is completely free, so you never have to worry about an unexpected charge.
When you select Zoom as your preferred event location, we’ll automatically generate the video conference details and save them to your calendar.
You can then send the meeting link and meeting ID via email or SMS to inform everyone on the call. This will prevent them from having to search for the information on their own, saving you valuable time. It will also minimize the number of no-shows , as people will be able to easily join the call from anywhere.
If you’re looking for a simple, convenient way to connect with your clients, the Zoom integration in Treffas does just that.
[/et_pb_text][/et_pb_column][/et_pb_row][/et_pb_section][et_pb_section fb_built=”1″ _builder_version=”4.18.0″ _module_preset=”default” custom_padding=”0px||||false|false” global_colors_info=”{}”][et_pb_row module_class=”support-contents-container” _builder_version=”4.18.0″ _module_preset=”default” width=”90%” max_width=”800px” animation_style=”fade” animation_duration=”1500ms” global_colors_info=”{}”][et_pb_column type=”4_4″ _builder_version=”4.18.0″ _module_preset=”default” global_colors_info=”{}”][et_pb_text admin_label=”Text” module_class=”width-image” _builder_version=”4.18.0″ _module_preset=”default” text_font_size=”18px” text_line_height=”172%” header_text_align=”center” header_2_text_color=”#000000″ header_2_font_size=”30px” header_2_line_height=”130%” module_alignment=”center” custom_margin=”20px||0px||false|false” text_font_size_tablet=”18px” text_font_size_phone=”16px” text_font_size_last_edited=”on|phone” header_text_align_tablet=”center” header_text_align_phone=”left” header_text_align_last_edited=”on|phone” header_font_size_tablet=”50px” header_font_size_phone=”46px” header_font_size_last_edited=”on|phone” text_orientation_tablet=”center” text_orientation_phone=”left” text_orientation_last_edited=”off|desktop” global_colors_info=”{}”]
Adding the App
Integrating Treffas with Zoom requires the user to have his own Zoom account. Treffas will use the user’s account to access the Zoom call features. When you add a meeting or a schedule on the calendar you can add a Zoom call. You need to fill up a dialog box to create the Zoom link for the call.
The user should have a Zoom account prior to integrating Zoom into Treffas. If the user does not have an account, he can register on the Zoom page for free.
These are the steps to add Zoom to Treffas:
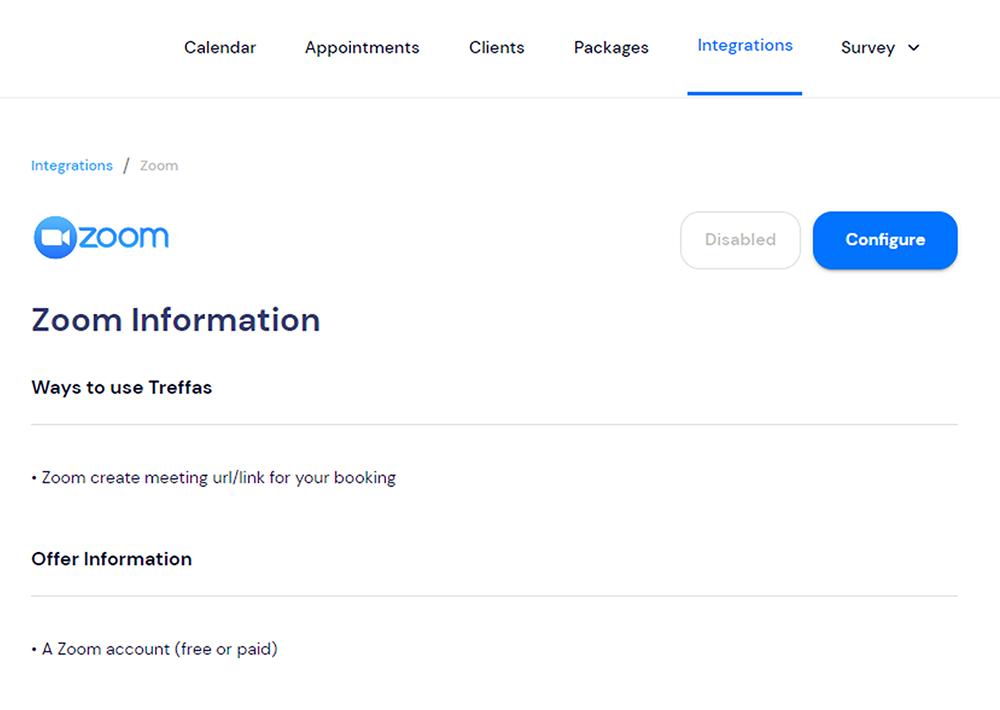
- On the main menu, click on Integrations.

- Click on the Zoom icon.
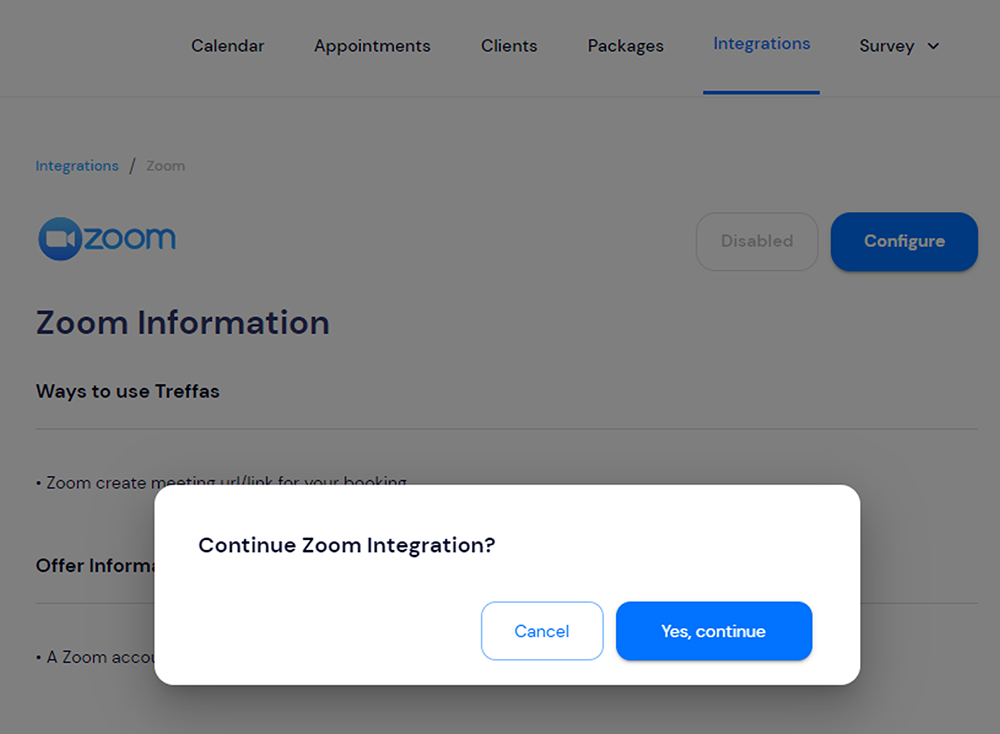
- Click Configure.
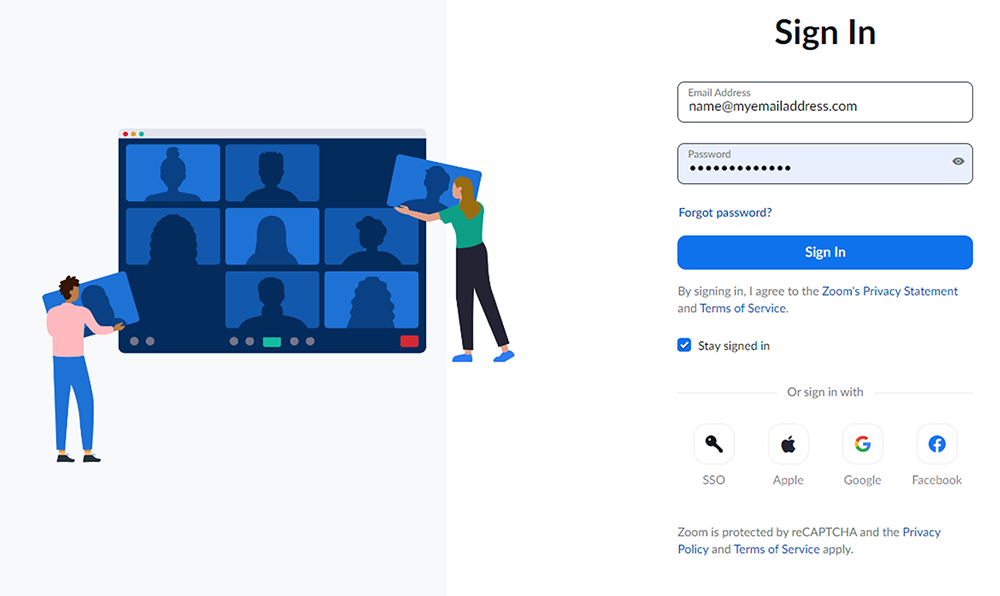
- A new tab will appear for the user to login to their Zoom account.
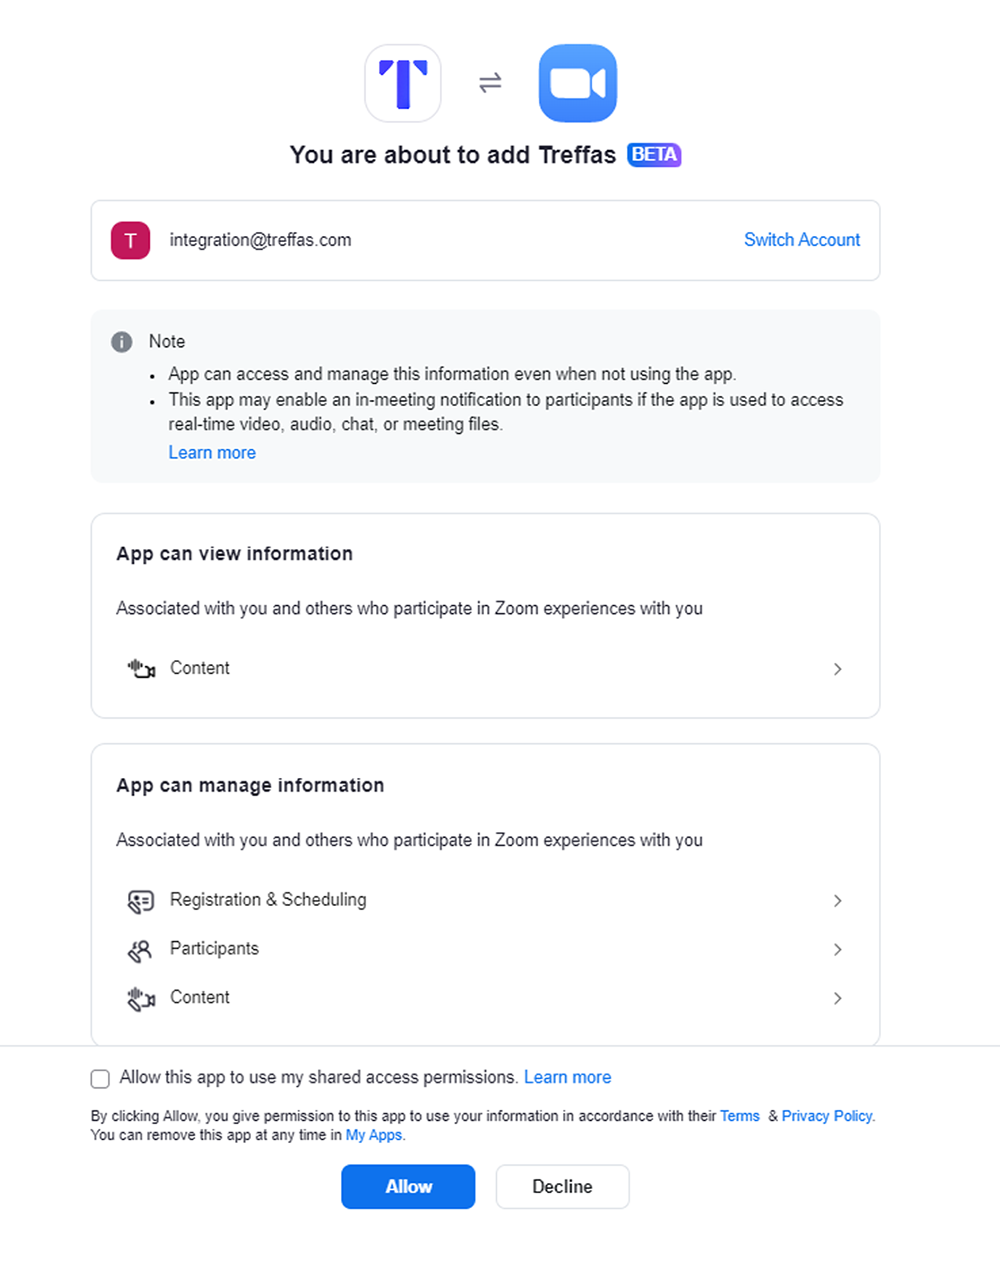
- After logging in to their account, an authorization page will appear. On this page, the user is informed that Treffas will be given access to the Zoom account. The user is also asked if they will allow Treffas to use the shared access permissions.
- Click Allow to continue with integration


[/et_pb_text][et_pb_text admin_label=”Text” module_class=”width-image” _builder_version=”4.18.0″ _module_preset=”default” text_font_size=”18px” text_line_height=”172%” header_text_align=”center” header_2_text_color=”#000000″ header_2_font_size=”30px” header_2_line_height=”130%” module_alignment=”center” custom_margin=”20px||0px||false|false” text_font_size_tablet=”18px” text_font_size_phone=”16px” text_font_size_last_edited=”on|phone” header_text_align_tablet=”center” header_text_align_phone=”left” header_text_align_last_edited=”on|phone” header_font_size_tablet=”50px” header_font_size_phone=”46px” header_font_size_last_edited=”on|phone” text_orientation_tablet=”center” text_orientation_phone=”left” text_orientation_last_edited=”off|desktop” global_colors_info=”{}”]
Usage
The Treffas integration with Zoom allows the user to access Zoom from the Treffas board. When a schedule or event is created, the user can also create a schedule for a Zoom meeting.
Steps to schedule a Zoom meeting.
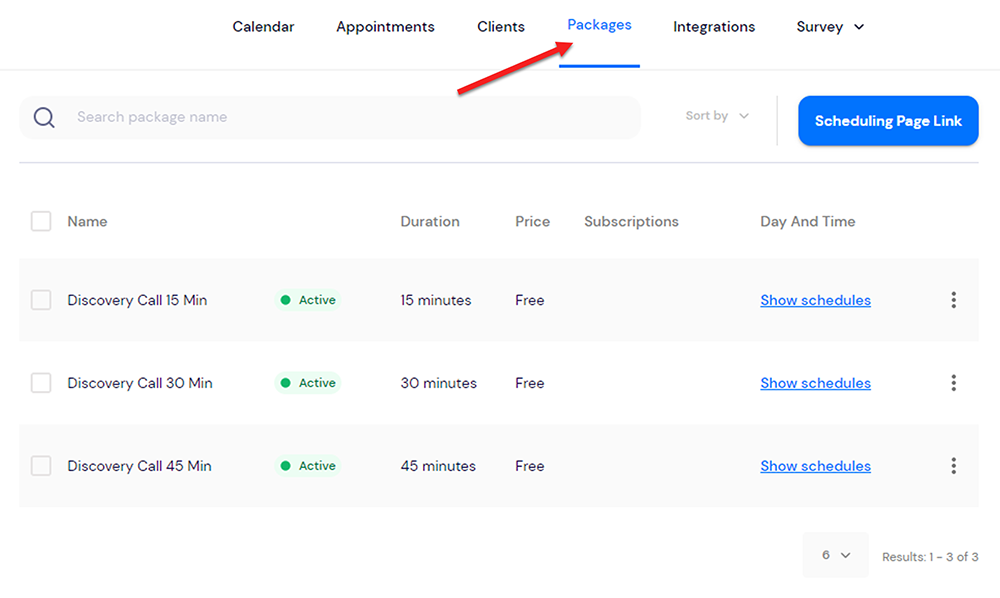
- On the main menu, click on Packages.
- From the list, choose the meeting type and click on that item’s menu.
- From the dropdown menu, choose Share.
- A dialog box will appear to allow sharing the link. Click on the Open Link icon to go to the appointment calendar.
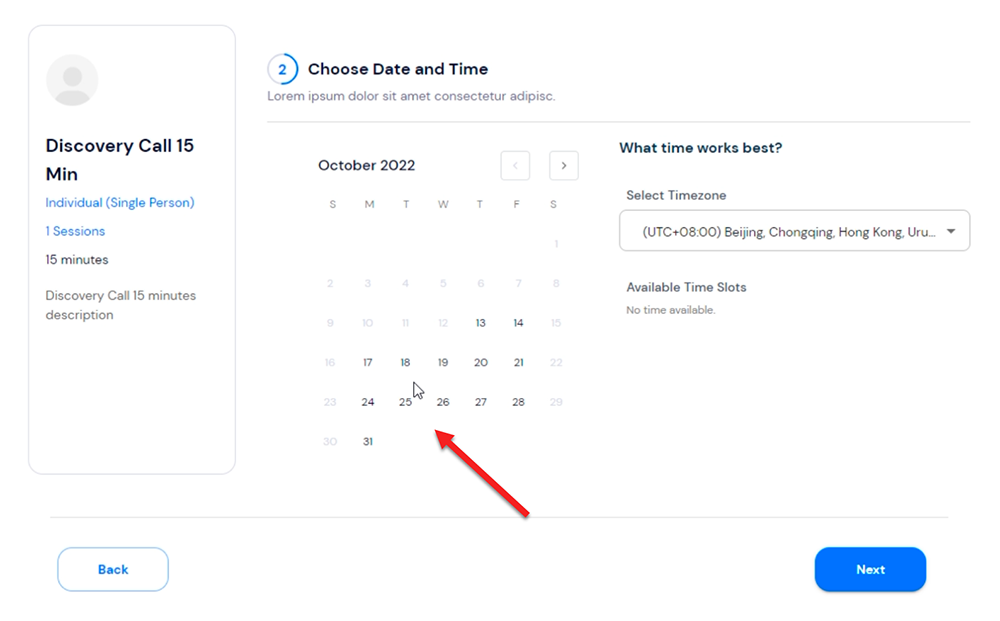
- A new Treffas page will appear, Click on the appointment date on the calendar and choose next.
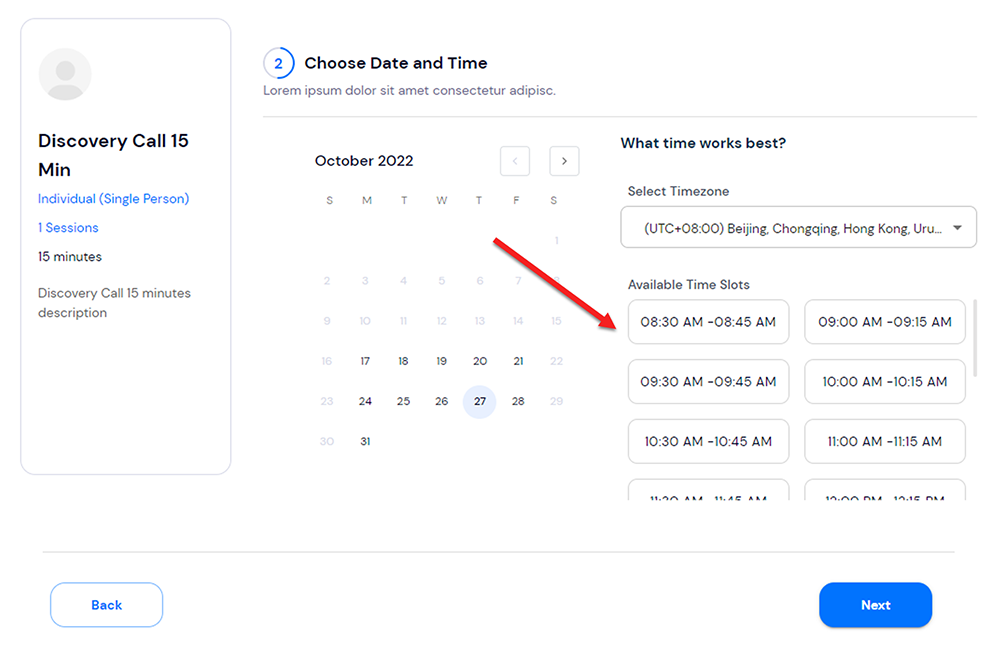
- Choices for meeting time will appear on the right side of the page. Choose a time and click next.
- The next page prompts for the client information page. Type in the first and last name, email address and phone number in the appropriate boxes. Additional information like the address can also be entered here. After entering the required information, click next.
- Select the payment type, and click next.
- An email will be sent to the email address of the appointment attendees. The email includes a link to the Zoom meeting.
Note: After you create a booking, you will immediately receive an email confirmation with the Zoom link and the meeting details.

[/et_pb_text][et_pb_text _builder_version=”4.18.0″ _module_preset=”default” text_font_size=”18px” text_line_height=”172%” header_text_align=”center” header_2_text_color=”#000000″ header_2_font_size=”30px” header_2_line_height=”130%” module_alignment=”center” custom_margin=”35px||0px||false|false” text_font_size_tablet=”18px” text_font_size_phone=”16px” text_font_size_last_edited=”on|phone” header_text_align_tablet=”center” header_text_align_phone=”left” header_text_align_last_edited=”on|phone” header_font_size_tablet=”50px” header_font_size_phone=”46px” header_font_size_last_edited=”on|phone” text_orientation_tablet=”center” text_orientation_phone=”left” text_orientation_last_edited=”off|desktop” global_colors_info=”{}”]
Removing the App
You can remove the connection between Treffas and Zoom in two ways. You can deauthorize Zoom from Treffas or you can go to your Zoom account and deauthorize Treffas.
To deauthorize on Treffas:
- On the main menu, click on Integrations.
- Click on the Zoom icon.
- Click Disable. You will be informed that you are disabling Zoom and that the process cannot be undone.
After you have deauthorized the connection from Zoom, it automatically deauthorizes from the Treffas app.
[/et_pb_text][/et_pb_column][/et_pb_row][et_pb_row column_structure=”3_5,2_5″ make_equal=”on” _builder_version=”4.18.0″ _module_preset=”default” background_color=”#e6e6e6″ width=”90%” custom_margin=”80px||80px||true|false” custom_padding=”40px|40px|40px|40px|true|true” animation_style=”slide” animation_direction=”bottom” border_radii=”on|30px|30px|30px|30px” global_colors_info=”{}”][et_pb_column type=”3_5″ module_class=”middle-align” _builder_version=”4.18.0″ _module_preset=”default” global_colors_info=”{}”][et_pb_text _builder_version=”4.18.0″ _module_preset=”default” header_3_font_size=”30px” header_3_line_height=”120%” global_colors_info=”{}”]
Didn’t find exactly what you’re looking for or have a question?
We’re here to help. Our team offer email support Monday to Friday and we always try to reply to you within 48 hours.[/et_pb_text][et_pb_button button_url=”#support-contact” button_text=”Contact Support” button_alignment_tablet=”center” button_alignment_phone=”left” button_alignment_last_edited=”on|phone” disabled_on=”off|off|off” module_class=”open-popup-link” _builder_version=”4.18.0″ _module_preset=”default” custom_button=”on” button_text_size=”18px” button_text_color=”#FFFFFF” button_bg_color=”#0173fe” button_border_width=”0px” button_border_radius=”8px” button_use_icon=”off” custom_padding=”10px|30px|10px|30px|true|true” custom_css_main_element=”line-height: 31px!important;||width: 245px;||max-width: 100%;||text-align:center;” locked=”off” global_colors_info=”{}” button_bg_color__hover_enabled=”on|hover” button_bg_color__hover=”#18acfe” button_bg_enable_color__hover=”on”][/et_pb_button][/et_pb_column][et_pb_column type=”2_5″ module_class=”middle-align” _builder_version=”4.18.0″ _module_preset=”default” global_colors_info=”{}”][et_pb_image src=”https://treffas.com/wp-content/uploads/2022/08/Treffas-FAQs.png” title_text=”Treffas FAQs” _builder_version=”4.18.0″ _module_preset=”default” global_colors_info=”{}”][/et_pb_image][/et_pb_column][/et_pb_row][et_pb_row use_custom_gutter=”on” gutter_width=”1″ make_equal=”on” module_id=”support-contact” module_class=”white-popup mfp-hide” _builder_version=”4.18.0″ _module_preset=”default” background_color=”#FFFFFF” max_width=”600px” custom_padding=”0px||0px||true|false” border_radii=”on|20px|20px|20px|20px” global_colors_info=”{}”][et_pb_column type=”4_4″ module_class=”pop-up-column-1″ _builder_version=”4.18.0″ _module_preset=”default” custom_padding=”40px|40px|40px|40px|true|true” global_colors_info=”{}”][et_pb_text _builder_version=”4.18.0″ _module_preset=”default” text_font=”DM Sans||||||||” text_text_color=”#060a2d” text_font_size=”18px” header_text_align=”center” header_text_color=”#0173fe” header_font_size=”35px” header_4_font=”DM Sans||||||||” header_4_text_color=”#060a2d” custom_margin=”||10px||false|false” global_colors_info=”{}”]
Email with our support team
[/et_pb_text][et_pb_code _builder_version=”4.18.0″ _module_preset=”default” global_colors_info=”{}”]
By submitting this form, you agreeto our Terms & Privacy Policy.
[/et_pb_code][/et_pb_column][/et_pb_row][/et_pb_section]